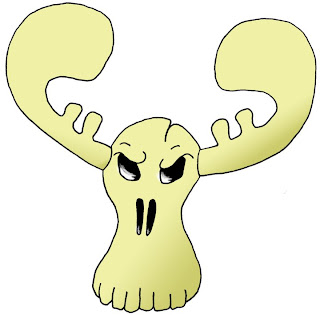
To start, I carefully erased all the pencil lines and shading before scanning in grayscale at 600 dpi (really ppi), since the drawing was a bit small (about 2 inches high) and I wanted it to be as large as possible. 600dpi is the highest native resolution my scanner supports.
Next, I opened the file in PhotoShop and used the Threshold adjustment to eliminate almost all the background, and make the line art nice and black. After that, I had a bit of initial clean up to do with the eraser tool, and then I zoomed in on the inked lines and cleaned them up a bit using a combination of the paint brush in airbrush mode, and a layer mask. The overall line work in the sketch isn't very good - a bit shaky and not nearly as smooth on the curves as I'd like. I may re-visit it someday and cleanup the lines even more.
Once I was satisfied with the line art, I started creating layers for the coloring as follows:
Eye and nose fill layer
Head fill layer
Antlers fill layer
Shadows layer mask
Highlights layer
I colored the eyes and nose black, then colored the head and antlers. After that I used a layer mask for the shadowing, and played with gradient fills to get some basic shadowing in place, attempting to simulate a light source coming from the upper left of the image. It's not perfect by any means, and is also something I may re-visit at a later date.
The last thing I did was some white highlights in the eyes and nose, to give the illusion of eye and nose sockets. I was going to work on some more highlights for the head and antlers, using a layer mask, but decided to leave the drawing as-is for the meantime.

No comments:
Post a Comment